How to View Your NFT in Your Wallet (Part 3/3 of NFT Tutorial Series)
This tutorial is Part 3/3 in the NFT Tutorial series, where we view our newly minted NFT. However, you can use the general tutorial for any ERC-721 token using MetaMask, including on Mainnet or any testnet. If you’d like to learn how to mint your own NFT on Ethereum, you should check out Part 1 on How to Write & Deploy an NFT smart contract!
Congrats! You’ve made it to the shortest and simplest part of our NFT tutorial series — how to view your freshly minted NFT on a virtual wallet. We’ll be using MetaMask for this example since it is what we used in the previous two parts.
As a prerequisite, you should already have MetaMask on mobile installed, and it should include the account to which you minted your NFT — you can get the app for free on iOS (opens in a new tab) or Android (opens in a new tab).
Step 1: Set your network to Sepolia
At the top of the app, press the “Wallet” button, after which you’ll be prompted to select a network. As our NFT was minted on the Sepolia network, you’ll want to select Sepolia as your network.
Step 2: Add your collectable to MetaMask
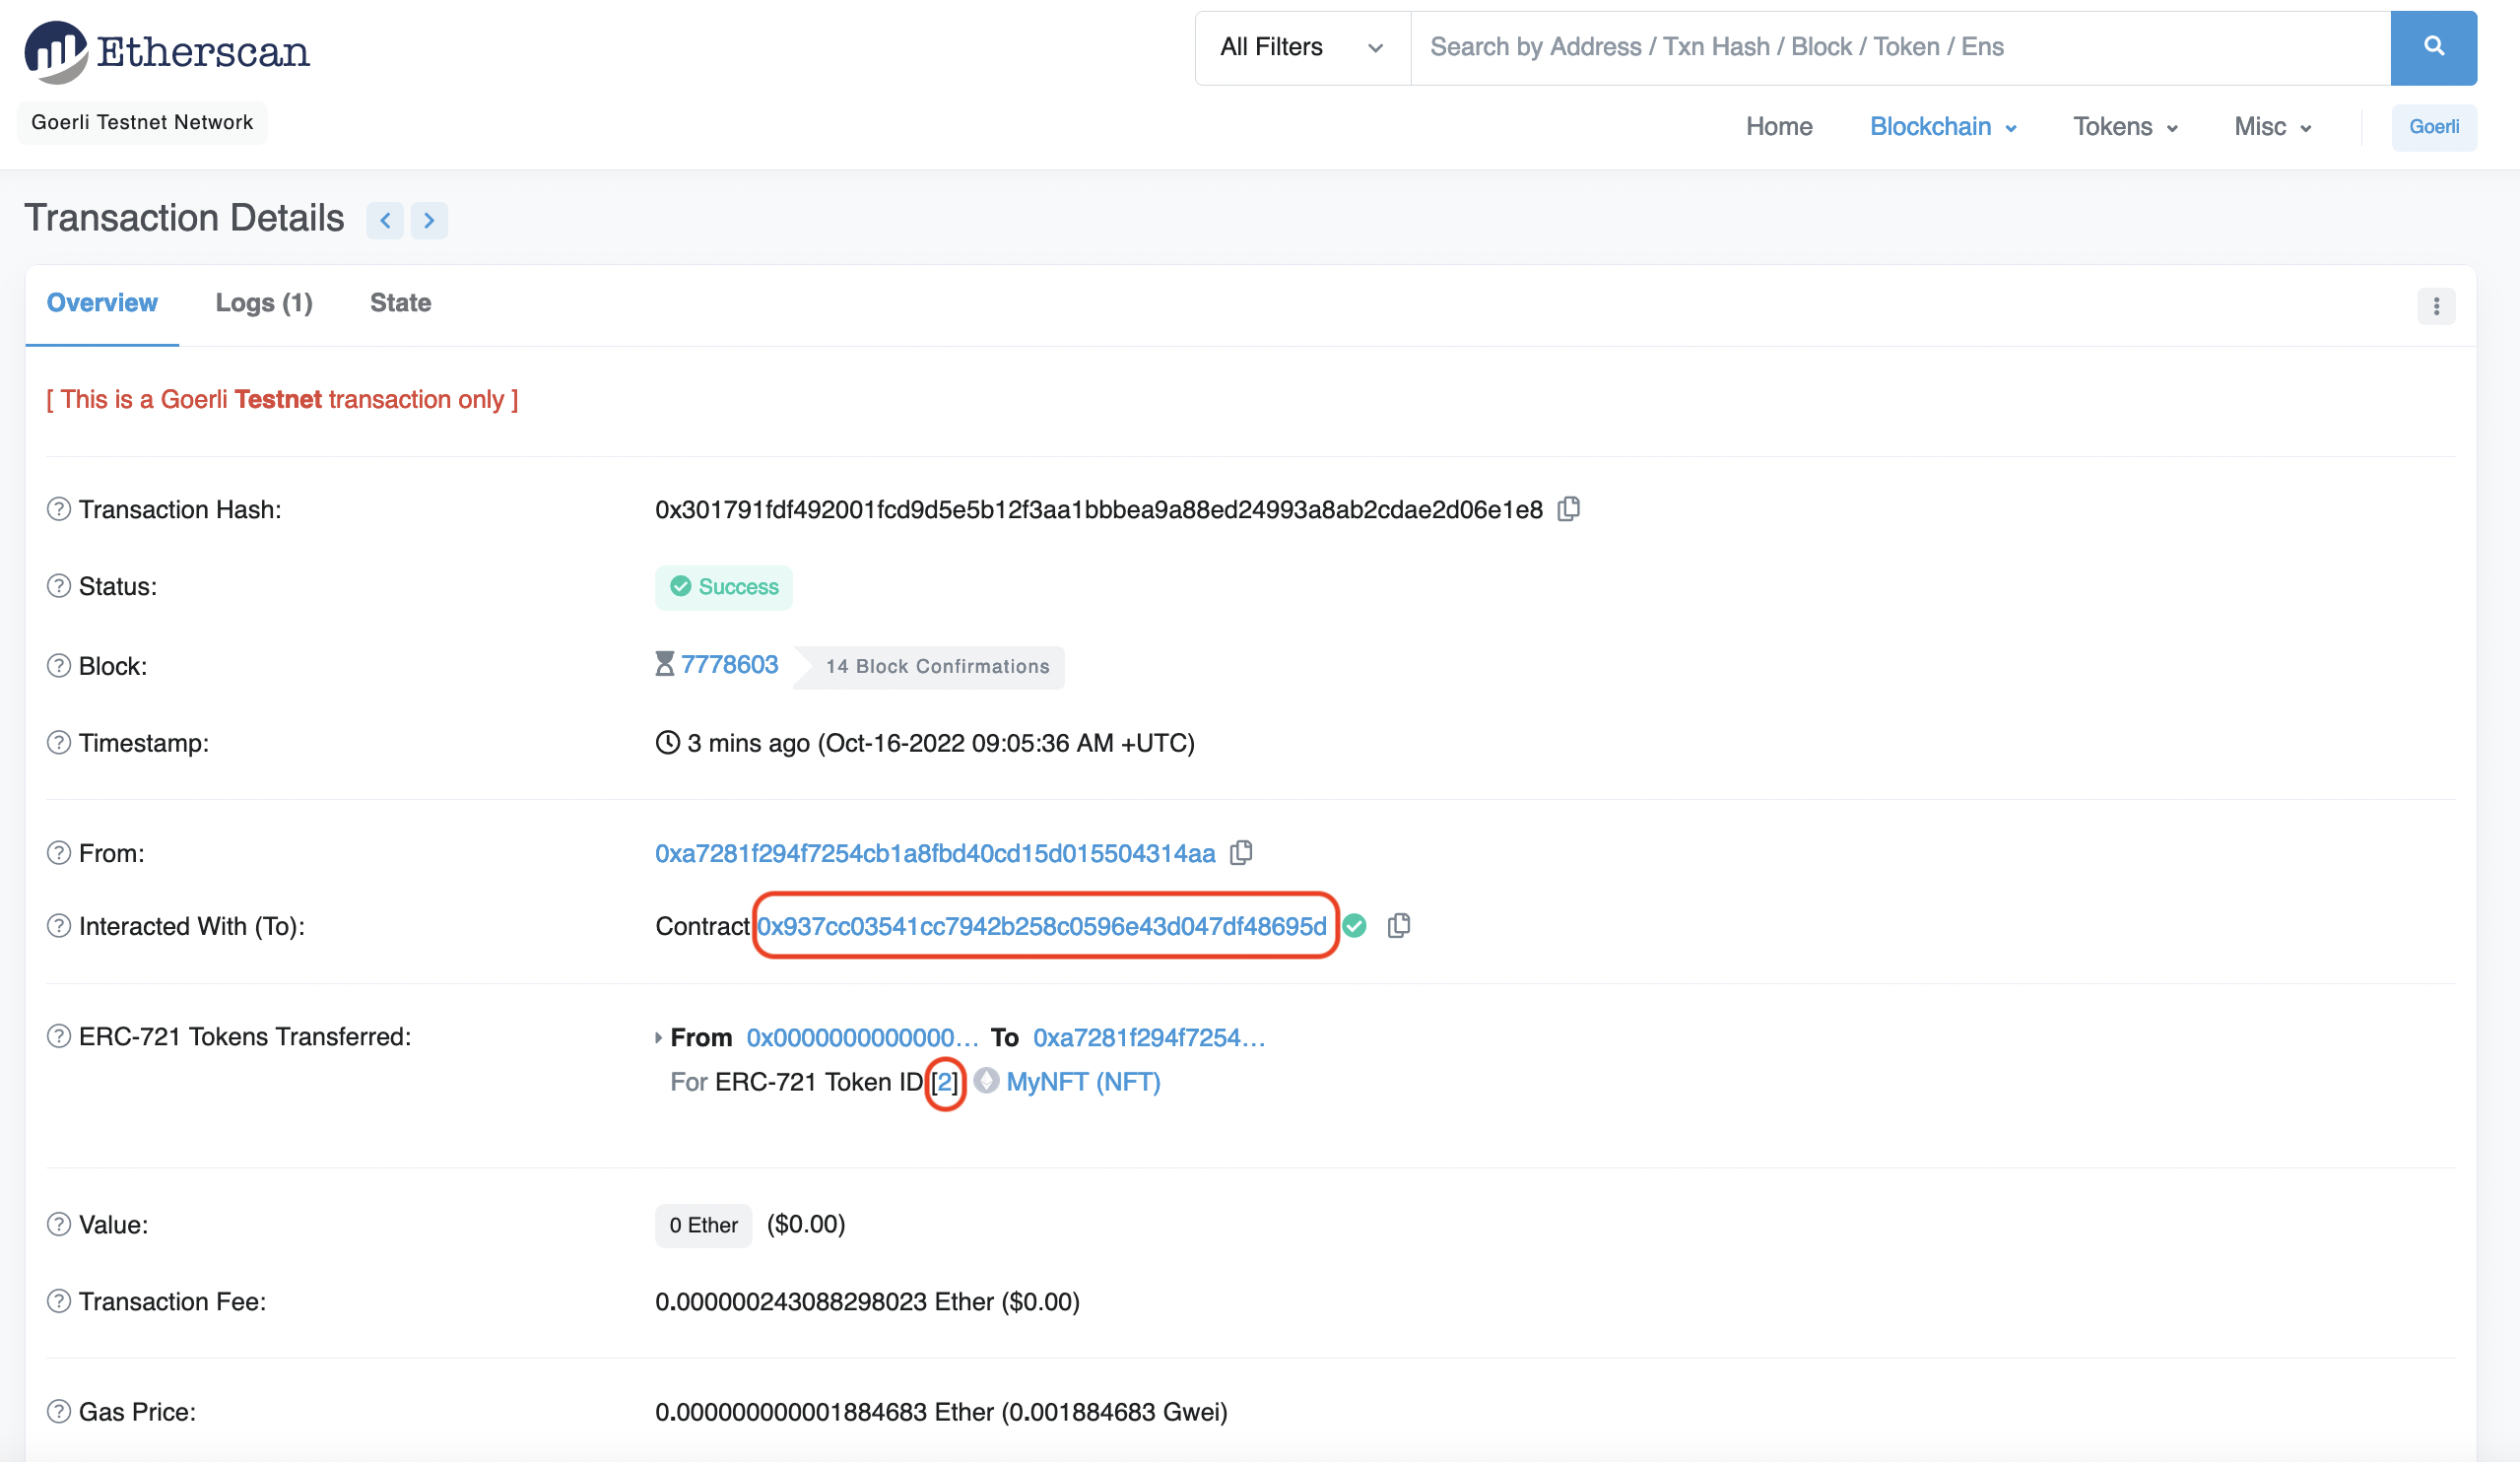
Once you’re on the Sepolia network, select the “Collectibles” tab on the right and add the NFT smart contract address and the ERC-721 token ID of your NFT — which you should be able to find on Etherscan based on the transaction hash from your NFT deployed in Part II of our tutorial.
You may need to refresh a couple times to view your NFT — but it will be there !
Congrats! You have successfully minted an NFT, and you can now view it! We can’t wait to see how you’ll take the NFT world by storm!